How to Plan an IoT Prototype Before Buying Components
A practical planning checklist for students, startups, and technical founders who want to define the problem, interfaces, power path, and test stages before ordering hardware.
- Prototyping
- Sensors
- Power Management
- ESP32
- Firmware
- Telemetry
- Published
- Updated
- Reading time
- 5 min read
- Author
- Saroj Chaudhary
- Role
- IoT & Embedded Systems Engineer

Many early IoT projects burn time and money because parts are ordered before the system is defined. A prototype does not need perfect architecture, but it does need a clear question to answer.
Planning first usually produces a better first order list, cleaner firmware decisions, and fewer “why did we buy this module?” moments later.
If the main need is a structured path from idea to working build, the IoT project development page explains that service direction more directly.
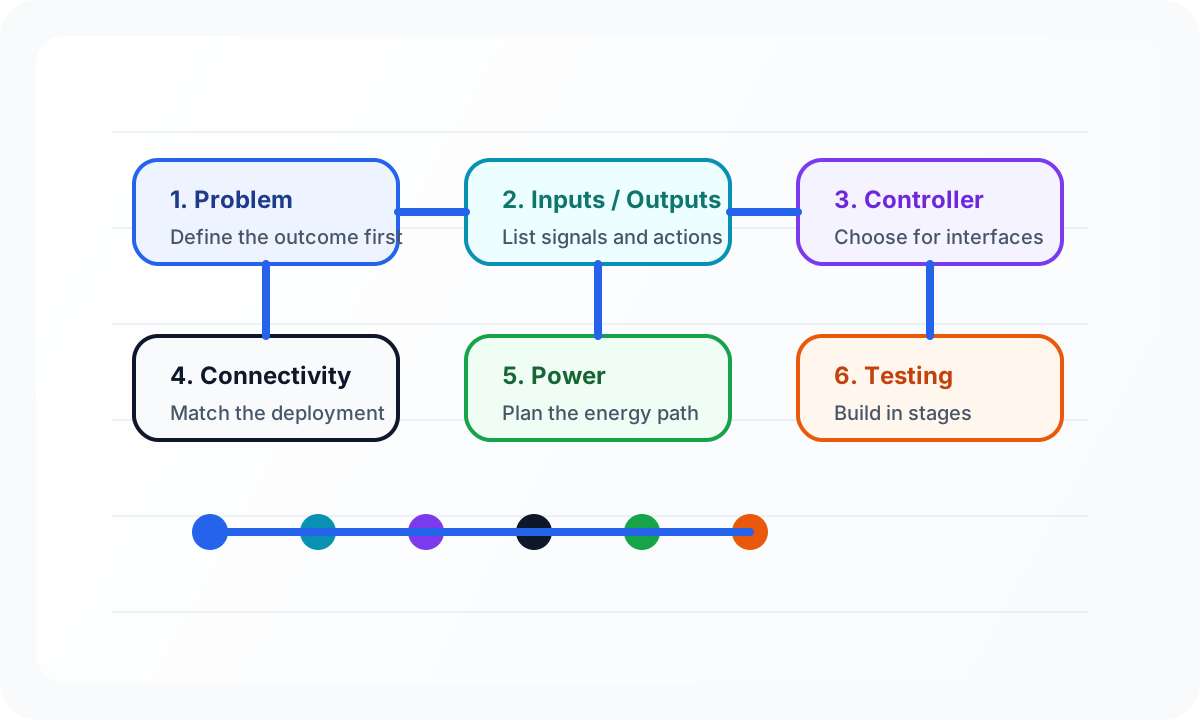
Start with one outcome
A prototype should prove something specific. Good examples are:
- measure soil moisture and trigger irrigation safely
- send temperature and humidity data from one remote outdoor node
- test whether a dashboard workflow is useful to an operator
Weak goals sound like “build an IoT device” or “make something smart.” They are too broad to guide the hardware.
If the outcome is clear, the parts list becomes smaller and the test plan becomes easier to write.
List the inputs and outputs before choosing the board
Write down what the system must observe and what it must do.
Inputs might include:
- analog sensor values
- digital switches
- serial data from a GPS or modem
- battery voltage
Outputs might include:
- a relay
- a pump or valve command
- a local display
- a cloud or dashboard update
This step is more important than comparing controller brands. It tells you what interfaces the device actually needs.
Choose sensors after you define the measurement
The first sensor listed in an online marketplace is rarely the best design answer. Before selecting one, define:
- what range matters
- what accuracy is good enough
- how often the value changes
- whether the sensor sits indoors or outdoors
- what calibration effort is acceptable
That keeps you from buying components that are convenient to order but hard to justify in the real prototype.
Pick the controller for the interfaces and workflow
Controller choice should follow the system needs, not the other way around.
An ESP32-based prototype may be a great fit when you need Wi-Fi, BLE, common peripheral interfaces, and fast iteration. But if the real requirement is long battery life or a very specific communication path, another controller may be better.
In practice, a useful first-pass question is: “what board lets us validate the riskiest part of the system fastest?”
Decide connectivity based on the deployment, not the desk
A prototype on a desk with a nearby router behaves differently from a remote field device. That is why connectivity should be planned before the shopping cart is finalized.
You do not need every answer immediately, but you should know whether the build likely depends on:
- local Wi-Fi
- a phone or nearby gateway
- direct GSM/LTE telemetry
- a low-power long-range architecture such as LoRa
If that choice is still unclear, read the connectivity comparison guide before ordering a modem module just because it looks more “professional.”
For teams planning deployments in Nepal or other site-variable environments, the companion article on planning an IoT project in Nepal adds more field-oriented context around connectivity, power, and maintenance assumptions.
Plan the power path early
Power is not a later hardware detail. It shapes the whole prototype.
Ask early:
- USB powered or battery powered?
- rechargeable or replaceable cells?
- always on or duty cycled?
- indoor bench conditions or outdoor solar behavior?
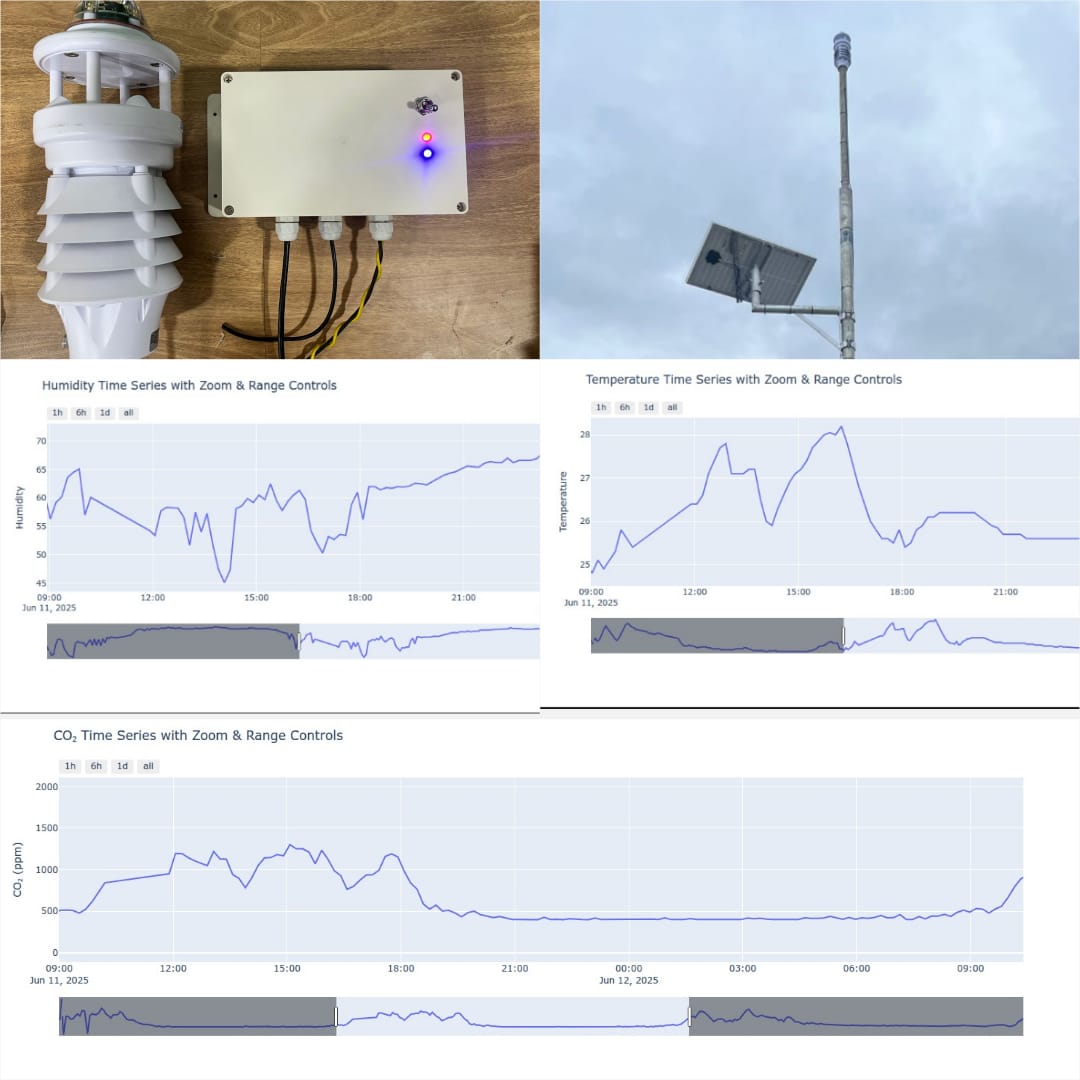
Power questions are especially important in systems like the solar-powered weather and air-quality monitoring station, where the sensing and telemetry decisions only make sense if the energy model is realistic too.
Think about environment and enclosure before revision two
Many prototypes work beautifully on a bench and fail immediately in dust, moisture, vibration, heat, or poor airflow.
You do not need a finished enclosure on day one, but you do need to note:
- outdoor exposure
- cable routing
- airflow requirements for environmental sensing
- access for charging or maintenance
- separation between logic-level wiring and higher-power paths
That note-taking alone usually improves the first hardware decisions.
Sketch the full data flow
Even if the system is simple, draw the path:
sensor → controller → connectivity → storage or API → dashboard or action
This is where many supposedly “hardware” decisions turn out to be system decisions. It also keeps the prototype aligned with the eventual IoT dashboards and platforms side if software visibility matters.
Break the prototype into stages
A staged prototype is easier to debug than a grand reveal.
- Validate one sensor or one input path.
- Validate the controller logic.
- Validate the output or actuator safely.
- Validate the connectivity path.
- Validate the end-to-end workflow.
This prevents you from debugging hardware, firmware, networking, and UI all at once.
Decide what must be tested before ordering round two
The first prototype should help answer a small number of high-value questions:
- Does the sensor behave as expected?
- Is the power draw acceptable?
- Does the communication path actually fit the site?
- Is the operator workflow useful?
- What changed once the system left the desk?
Planning does not slow you down
For students and startup teams, a lightweight planning pass often feels slower at first. In reality, it usually saves the most expensive form of time: the time spent rebuilding a prototype around assumptions that were never written down.
That is why practical hardware prototyping and research prototyping work begins with system questions before the first parts list becomes final.
Student teams can also use the dedicated final-year project support page when the project is academic and the support boundaries need to be explicit.