How to Install ESP32 and ESP8266 Boards in Arduino IDE
A step-by-step guide to adding ESP32 and ESP8266 Board Manager URLs in Arduino IDE, installing the board packages, selecting the correct board, and testing the setup.
- ESP32
- ESP8266
- Arduino IDE
- Boards Manager
- Embedded Systems
- IOT
- Published
- Updated
- Reading time
- 4 min read
- Author
- Saroj Chaudhary
- Role
- IoT & Embedded Systems Engineer
ESP32 and ESP8266 boards are widely used for IoT, automation, sensor monitoring, and embedded-system projects. Before programming these boards with Arduino IDE, the corresponding board support package must be installed.
Arduino IDE makes this easy through Boards Manager. The only extra step is adding the ESP32 and ESP8266 package URLs to the IDE preferences.
This guide shows the complete process using Arduino IDE 2.
Board Manager URLs
Use the following package URLs.
ESP8266
https://arduino.esp8266.com/stable/package_esp8266com_index.jsonESP32
The current stable URL recommended by Espressif is:
https://espressif.github.io/arduino-esp32/package_esp32_index.jsonYou may also come across this GitHub-hosted form of the ESP32 package index:
https://raw.githubusercontent.com/espressif/arduino-esp32/gh-pages/package_esp32_index.jsonFor a new setup, use the current stable URL from Espressif documentation.
1. Open Arduino IDE Preferences
Start Arduino IDE.
On Windows or Linux, go to:
File → PreferencesOn macOS, go to:
Arduino IDE → SettingsScroll down until you find:
Additional Boards Manager URLs
In Arduino IDE 2, click the button beside this field to open the URL list.
2. Add the ESP32 and ESP8266 URLs
Add one URL per line:
https://arduino.esp8266.com/stable/package_esp8266com_index.json
https://espressif.github.io/arduino-esp32/package_esp32_index.json
If other Board Manager URLs are already present, keep them and add the new URLs on separate lines.
Click OK to save the list, then close the Preferences window.
3. Open Boards Manager
Open Boards Manager using either:
Tools → Board → Boards Manageror click the Boards Manager icon in the left sidebar of Arduino IDE 2.
Arduino IDE will use the URLs you added to load the available ESP32 and ESP8266 board packages.
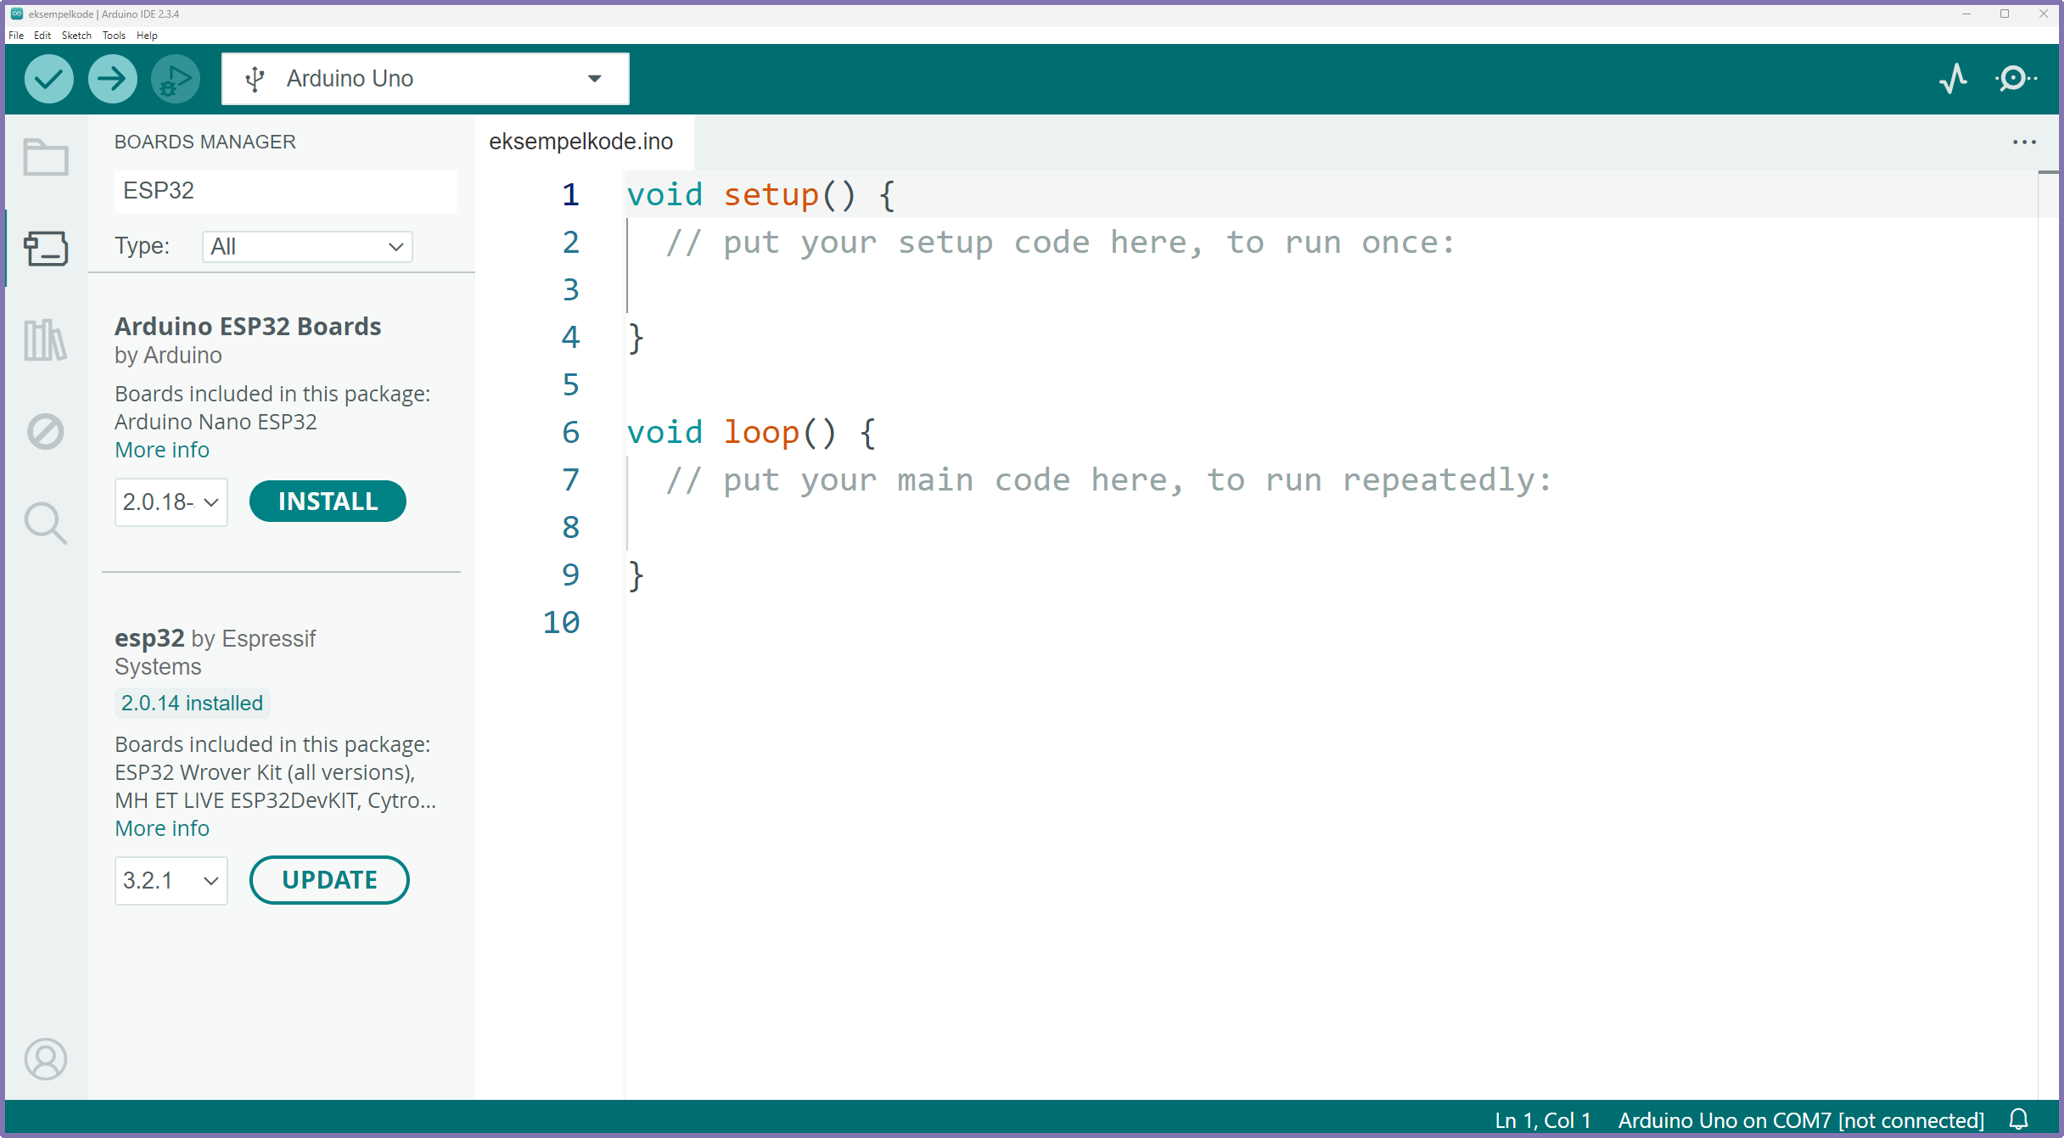
4. Install ESP32 Board Support
In Boards Manager, search for:
esp32Find the ESP32 platform from Espressif Systems and click Install.
Arduino IDE will download the ESP32 core, compiler tools, upload tools, and board definitions.
Wait until the installation finishes.
After installation, ESP32 boards will become available under:
Tools → Board5. Install ESP8266 Board Support
Open Boards Manager again and search for:
esp8266Select the ESP8266 platform and click Install.
Wait for Arduino IDE to finish downloading and installing the required files.
ESP8266 board options will then appear in the board selection menu.
6. Connect Your Development Board
Connect the ESP32 or ESP8266 board to your computer using a USB data cable.
A charging-only USB cable can power the board but will not allow firmware uploads.
After connecting the board, open:
Tools → Portand select the port assigned to your board.
Depending on the operating system, it may appear as something similar to:
COM3
COM5
/dev/ttyUSB0
/dev/ttyACM0
7. Select the Correct Board
The exact board selection depends on the development board you are using.
For a common ESP32 development board, you may use:
Tools → Board → esp32 → ESP32 Dev ModuleFor ESP8266 boards, choose the entry that matches your hardware, such as a NodeMCU or generic ESP8266 module.
Selecting the correct board is important because Arduino IDE uses the board definition to determine flash settings, upload method, memory layout, and compilation options.
8. Test the Installation
A simple Serial Monitor test is useful because it does not depend on whether your board has a built-in LED.
Create a new sketch and upload:
void setup() {
  Serial.begin(115200);
  delay(1000);
  Serial.println("ESP board setup successful");
}

void loop() {
  Serial.print("Uptime: ");
  Serial.print(millis() / 1000);
  Serial.println(" seconds");
  delay(1000);
}
After uploading, open:
Tools → Serial MonitorSet the baud rate to:
115200You should see output similar to:
ESP board setup successful
Uptime: 1 seconds
Uptime: 2 seconds
Uptime: 3 seconds
If this appears correctly, the board package, selected board, serial port, compiler, and upload process are working.
Common Problems
ESP32 or ESP8266 does not appear in Boards Manager
Check that the URLs were entered correctly.
For ESP8266:
https://arduino.esp8266.com/stable/package_esp8266com_index.jsonFor ESP32:
https://espressif.github.io/arduino-esp32/package_esp32_index.jsonAlso confirm that your computer has an active internet connection.
If necessary, close and reopen Arduino IDE after adding the URLs.
No serial port appears
Check the following:
- use a USB cable that supports data
- try another USB port
- reconnect the board
- check whether your operating system detects the USB device
- install the required USB-to-serial driver if your specific development board needs one
Upload fails
First confirm:
- the correct board is selected
- the correct serial port is selected
- no other application is using the serial port
- the USB cable is working
Some ESP32 development boards may require pressing or holding the BOOT button during the beginning of an upload.
Wrong board configuration
A project may compile but still fail to upload or operate correctly when the wrong board variant is selected.
Always match the Arduino IDE board selection with the actual ESP32 or ESP8266 development board you are using.
Updating the Board Packages
Board packages can be updated later through Boards Manager.
Open:
Tools → Board → Boards ManagerSearch for esp32 or esp8266. If a newer installed-package version is available, Arduino IDE will provide an update option.
For ongoing projects, especially deployed embedded systems, avoid changing core versions in the middle of development without testing. A newer core can introduce changes in libraries, APIs, networking behavior, or build settings.
Quick Setup Summary
The complete process is:
Install Arduino IDE
        ↓
Open Preferences
        ↓
Add ESP32 + ESP8266 Board Manager URLs
        ↓
Open Boards Manager
        ↓
Install ESP32 / ESP8266 platform
        ↓
Connect the board
        ↓
Select board + port
        ↓
Compile and upload
Once this setup is complete, Arduino IDE can be used to develop ESP32 and ESP8266 projects involving sensors, Wi-Fi, web servers, MQTT, automation, remote monitoring, and other IoT applications.
Official References
For the latest installation information, refer to the official documentation: